#layer-spotlight-1562
Released Friday, July 31
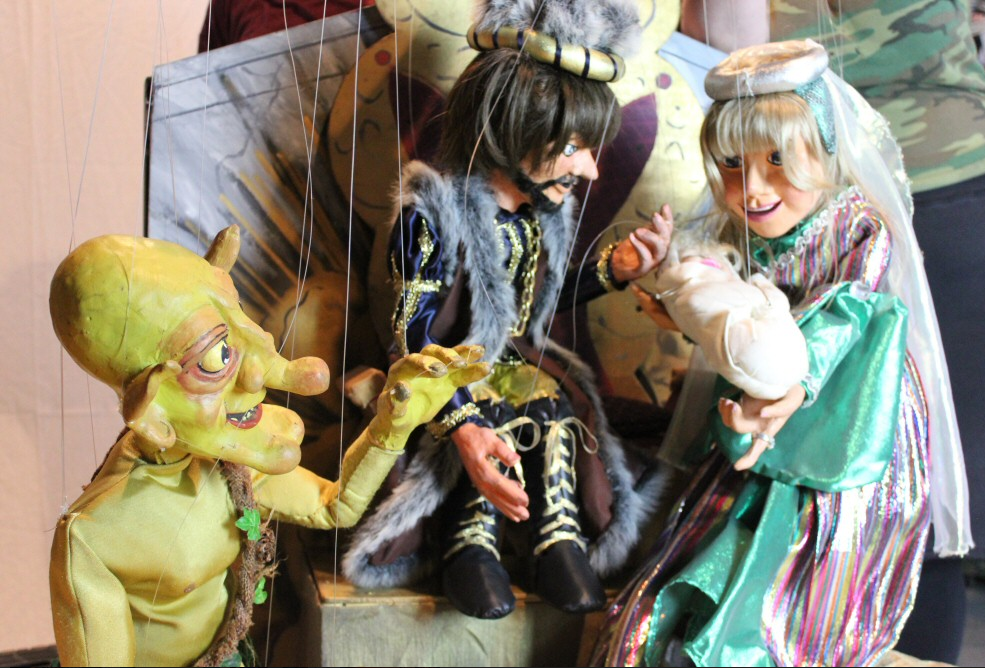
Virtual Family Fun Night: Columbia Marionette Theatre
This second edition of Virtual Family Fun Night features Columbia Marionette Theatre! Create an art project with CMA staffer Sherrie Belton, and enjoy an original performance of Rumpelstiltskin and a behind-the-scenes look at how the production was made. Appropriate for families and all ages.
#layer-duo-1563
Art Project: DIY Marionette Puppet
Tune in for instructions from CMA staffer Sherrie
Materials
- Two sheets of construction paper
- Markers or crayons
- Scissors
- Glue
- String or ribbon
- Two craft sticks or unsharpened pencils (straws or wooden dowels will work too)
- Cardboard roll (paper towel sized)
- Single hole punch (optional)
- Tape (optional)
Instructions
- Cut your cardboard roll into two pieces, with one piece being slightly longer than the other. The short piece will be the puppet’s head, and the long piece will be the puppet’s body. You may need an adult to help you cut through the tough cardboard.
- Now we need to cover the cardboard rolls in construction paper. No construction paper? No problem! You can decorate the rolls however you like using materials you have on hand (markers, paint, etc.)
- Time to make the legs and ears for our silly puppet. Cut five, one-inch, long strips of construction paper. Four strips will be the legs. Cut the fifth strip into two pieces for the ears. Now you have six pieces! Fold each piece accordion style.
- We want to connect the short piece of cardboard to the long piece of cardboard using string, so we need to punch holes. With adult assistance, cut/punch a hole on one end of the short piece (make sure it goes through both sides of the cardboard. Cut/punch a hole on each end of the long piece (make sure it goes through both sides of the cardboard).
- Make an “x” with your craft sticks/pencils. Tie them together using string/ribbon. You can add tape for additional support. This will be the crossbar or handle for the puppet.
- Now it’s time to glue on the accordion-folded paper strips. Add four long strips to the long piece of cardboard for legs. Add two short strips to the short piece of cardboard for ears.
- Now let’s connect the pieces! You should have the body, head, and crossbar. Cut two pieces of string/ribbon. They should be a little longer than a sheet of construction paper. Thread a piece of string through each hole on the long piece of cardboard. Then, thread the two ends through the holes of the short piece of cardboard. Tie the ends of the string to the crossbar.
- Decorate your puppet or make some more puppet friends. Then, dazzle your family and friends with your own puppet show!